Your system administrator shall provide you Klera URL. Open the URL in Google Chrome (Chrome is the recommended browser).
- Sign in to Klera - for existing users
- Sign up for Klera- for new users
- Successful Sign-in
- Klera Support
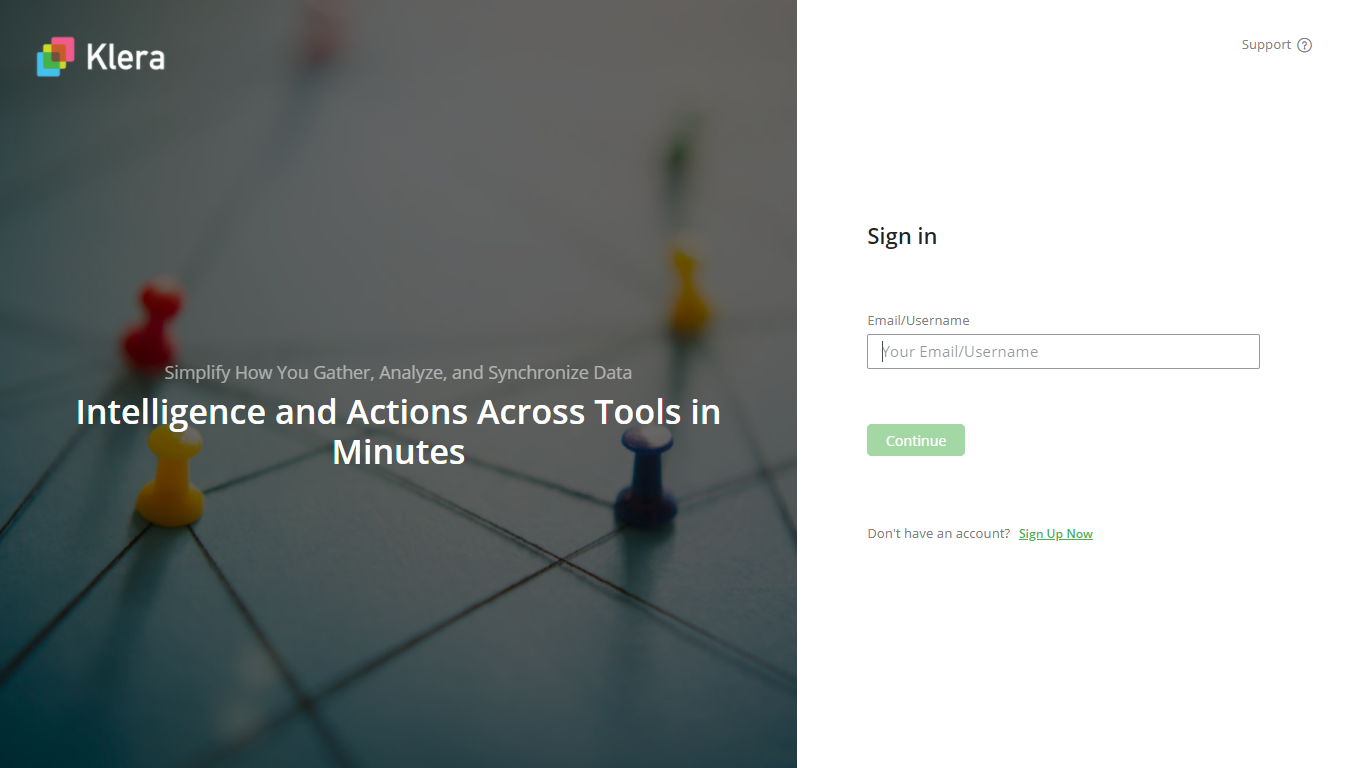
Sign in to Klera
- Enter your Email/Username
- Click Continue.
Note: If you don't have a Klera account, click on Sign Up Now.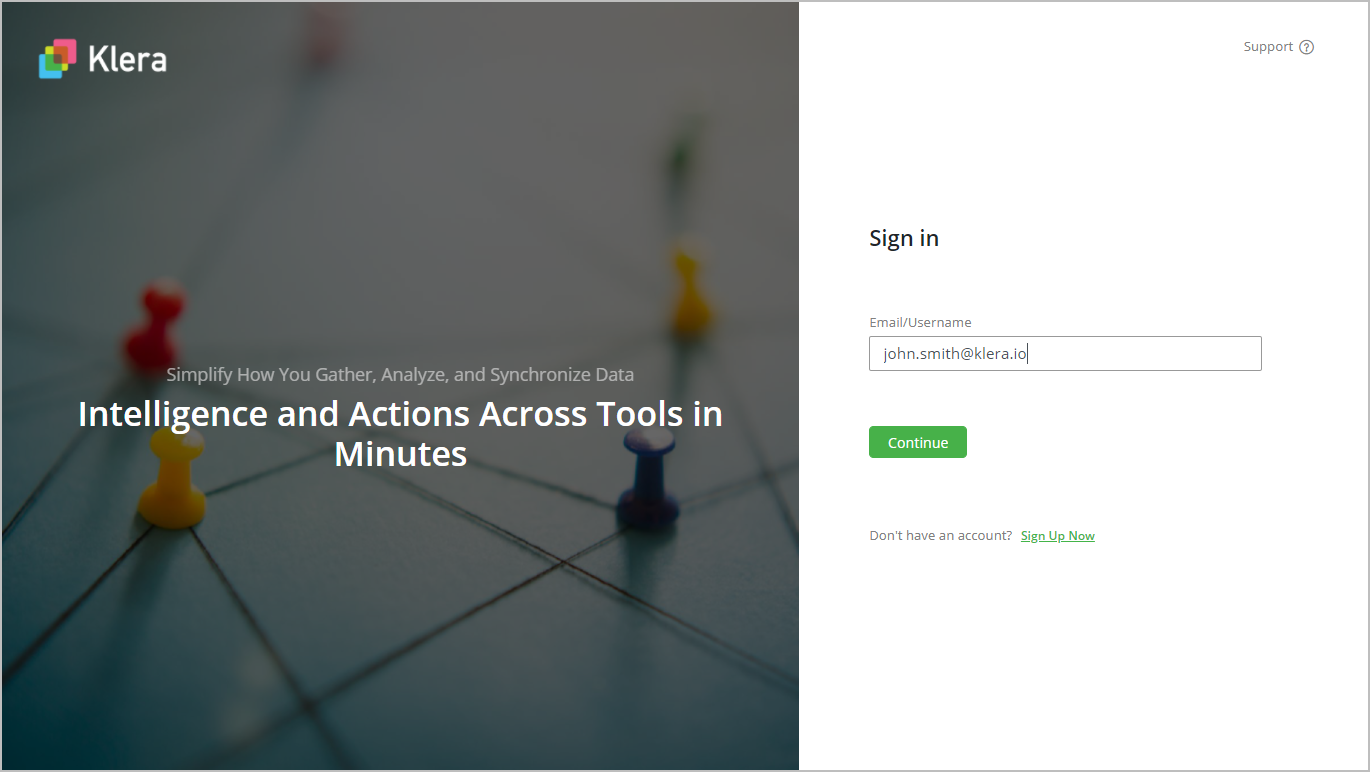
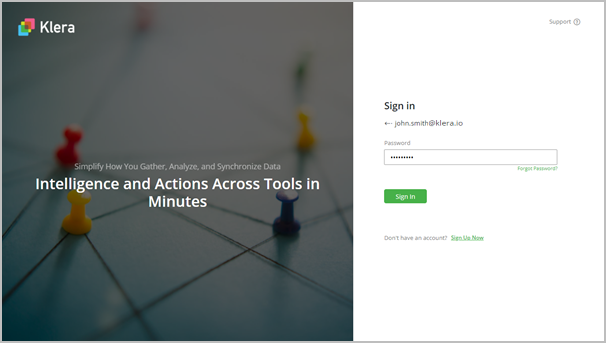
- Enter your password, your organization may use any of the following authentication schemes
- LDAP: Use your enterprise login credentials
- SAML: After you provide your enterprise user name and click on 'Continue', you will be redirected to your organization's authentication page. On this authentication page you need to re-enter your username and password. SAML supports Single-Sign-On (SSO).
- Klera Authentication: Some organizations use Klera’s native authentication and hence the username and password are setup by you when you sign up or can be provided pre-set by your Klera admin. You can reset your password using the Forgot Password? link.
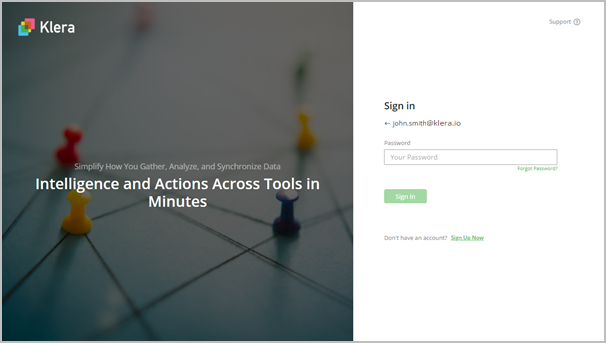
- Click Sign In.
Forgot Password?
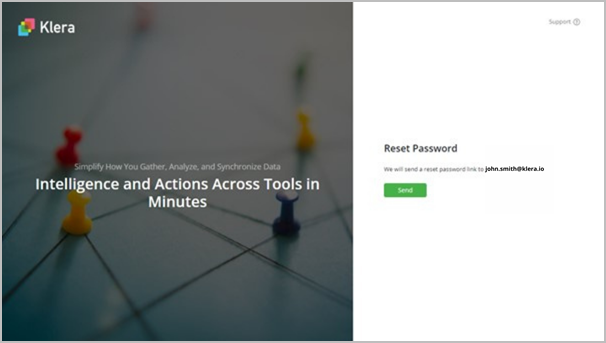
- After entering your Email/Username, Klera asks for your password. On this screen, click on the "Forgot Password" link.
Note: If your organization is using LDAP/SAML for authentication then you can not reset your password from Klera. Please use your organization's LDAP credential management portal to reset the password. - On the ‘Reset Password’ screen, click Send.
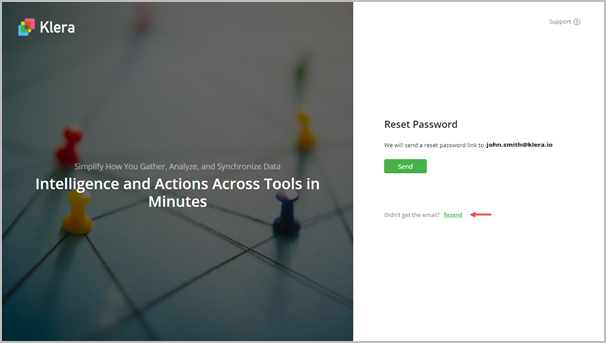
- You will receive an email with a Password Reset link. If you do not receive the mail, click on the Resend link.
Set/Reset Password
- A Password Rest link is sent to your email id registered with Klera.

- Click on the link. A Set Password screen will be shown.
- Enter a valid password.
- Re-enter the password in the ‘Confirm Password’ field.
Note: A valid password must be 8 -100 characters long, and include at least one numeric character.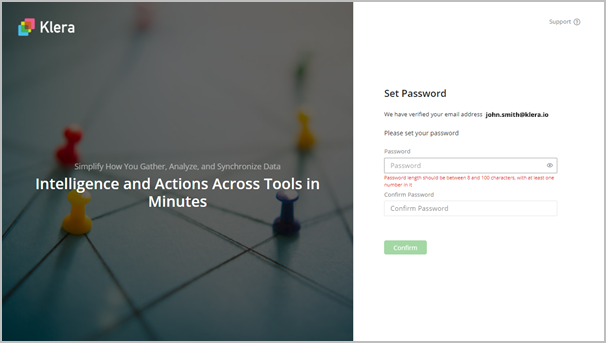
- Click Confirm.
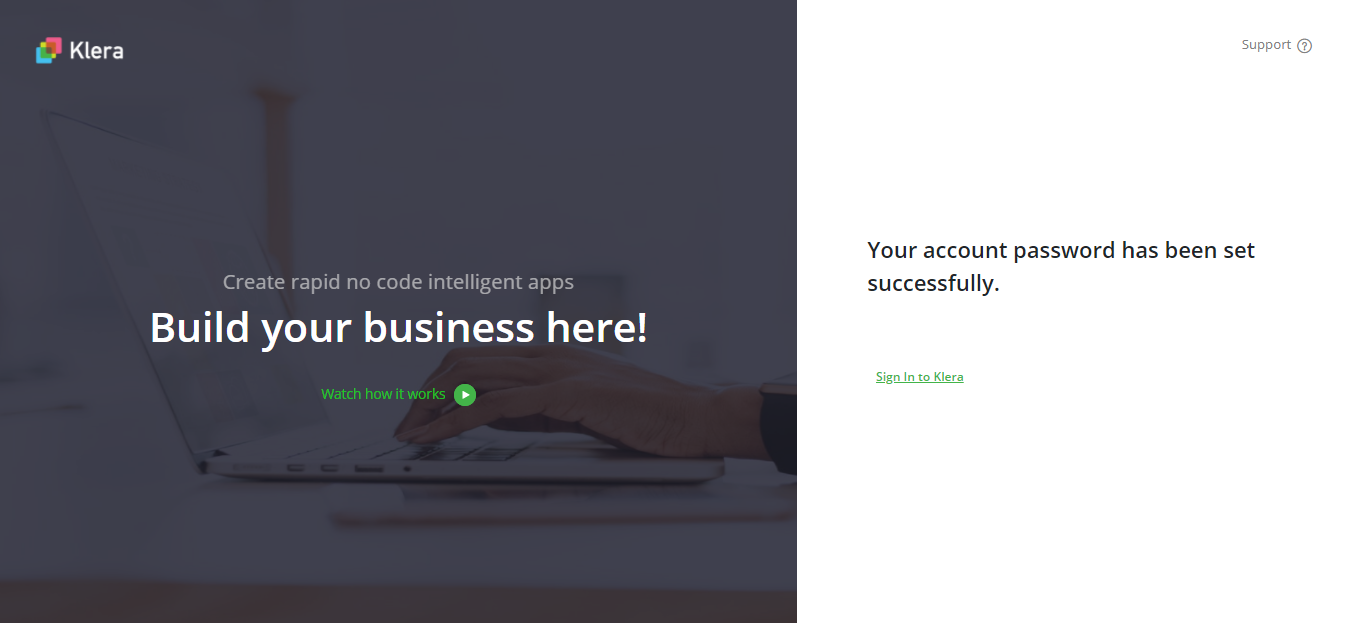
- Click on Sign in to Klera to log in to Klera.
Do not have a Klera Login?
- Click on the Sign Up Now link.

- The ‘Sign up’ screen is shown.
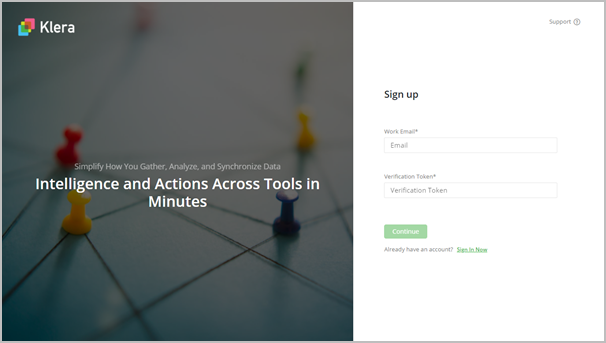
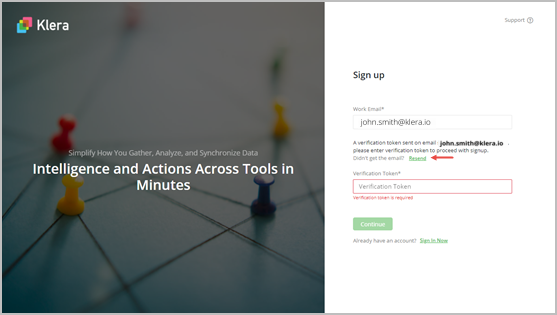
- Enter your Work Email id, and press ‘Tab’, Klera sends a Verification Token to your email id. Note: If you do not receive the mail, click on Resend.
- Check the following email in your mailbox.
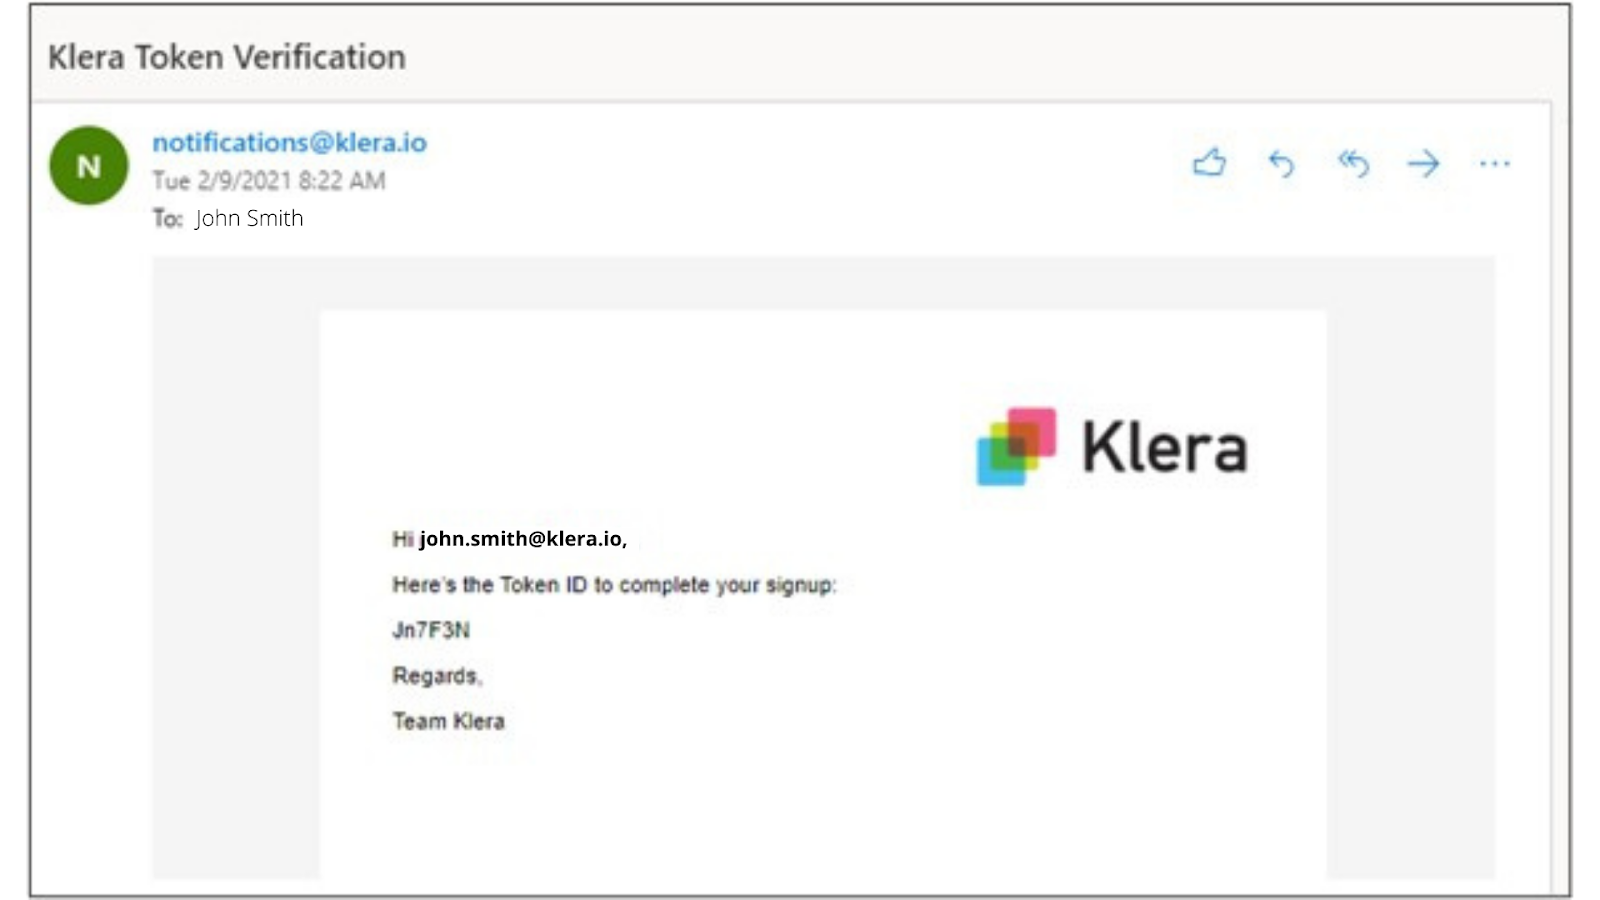
- Enter the Verification Token, received in email.
- Click Continue.
- Provide the following details.
-
- First Name
- Last Name
- Department
-
- Click ‘Sign Up’.
- An approval request is sent to the Klera Administrator of your organization.
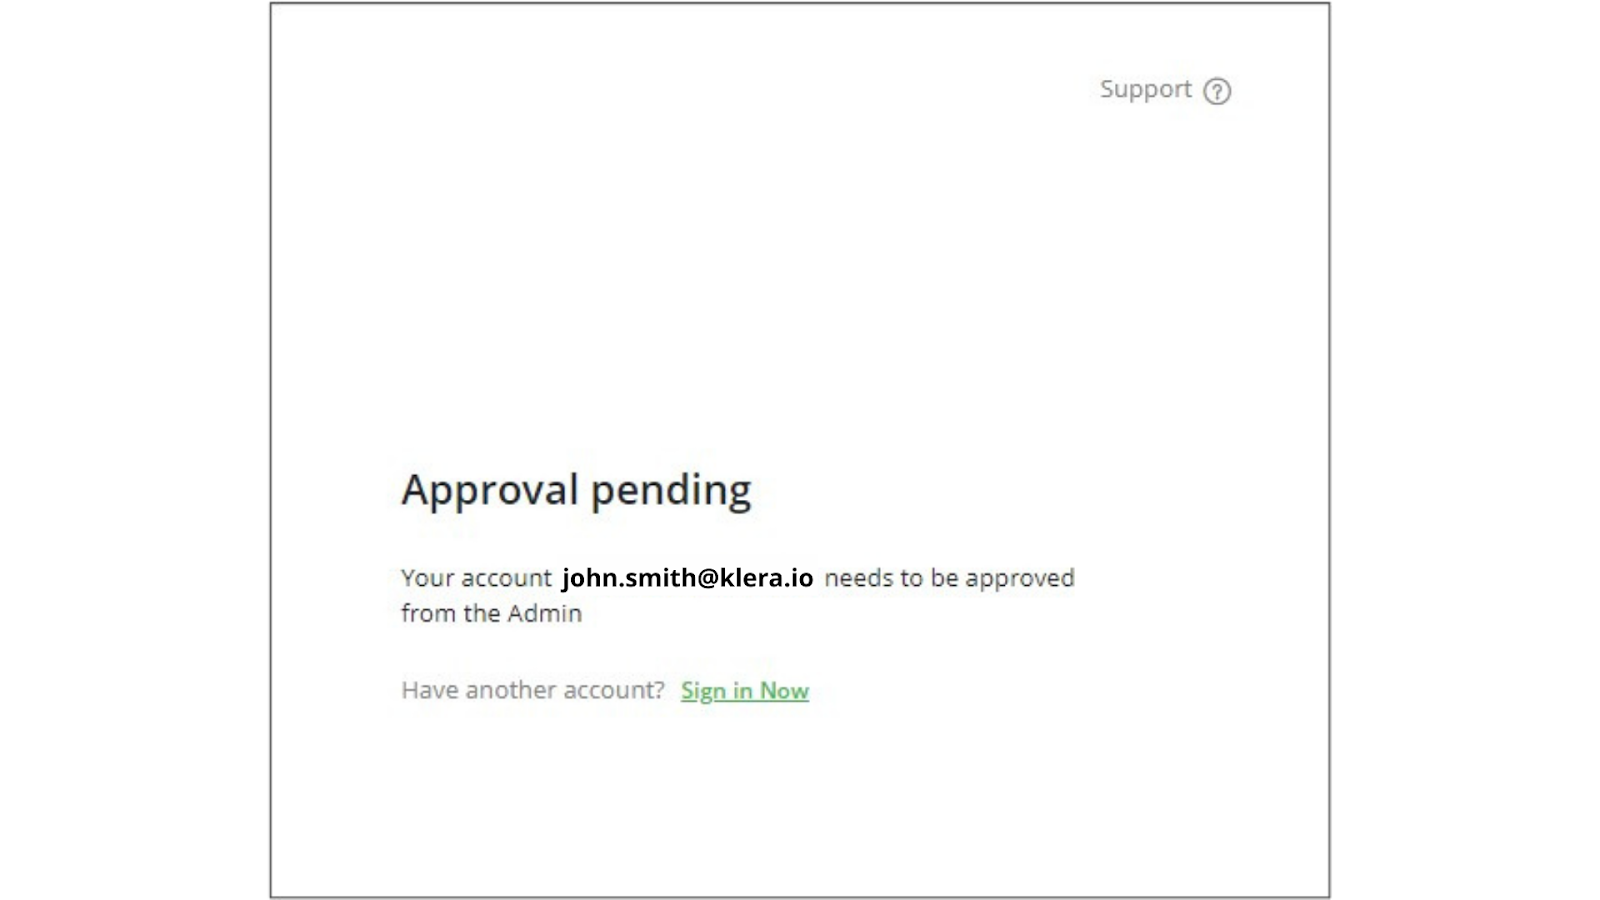
- When your Klera admin will approve your sign up request, you will receive another email.
- Check your work email and look for the following email. Click on the link to set your password and start experiencing Klera.
To learn more, refer to section- Set/Reset Password.
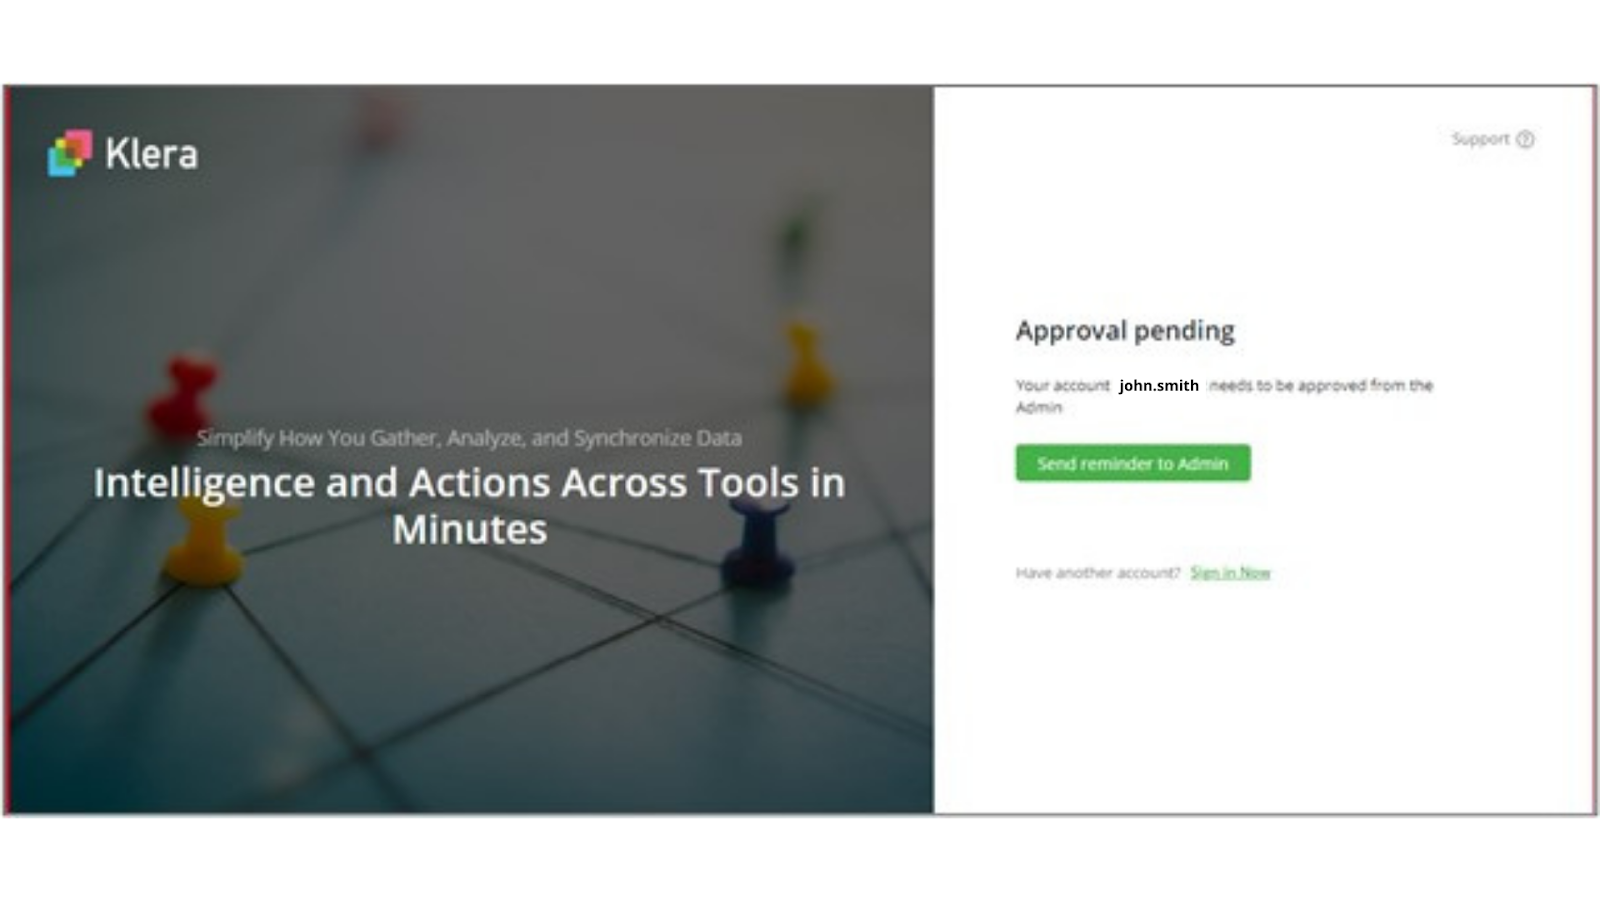
Resend the Approval Request to Admin
In case your sign-up request has not been approved by the admin, you can nudge the admin for approval.
- Open the Klera URL in Google Chrome. The Sign In screen will appear.
- Enter the email address you used to send a sign-up request earlier.
- Click on Send Reminder to Admin to resend approval requests to the admin.
Successful Sign-in
On a successful sign-in, you will land on ‘Klera Home’.
Klera Home will give you access to all your Apps, Data Sources and Templates. 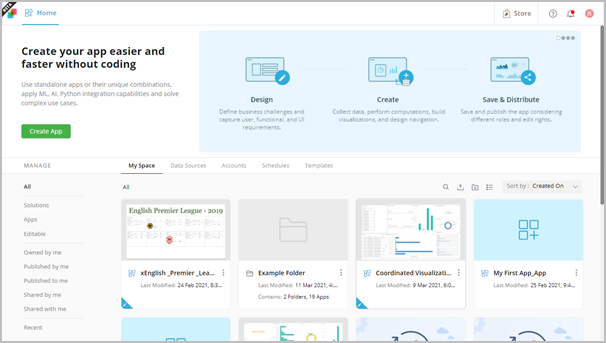
Klera Support
Click on 'Support' to access the learning portal, user guides and contact the support team.