Supported version: Cloud
API Rate Limit: None
Supported Authentication: Custom authentication
IMPORTANT: Please make sure your Checkmarx AST instance must be accessible from the Klera Machine.
To configure Checkmarx AST using Custom authentication, follow the steps below:-
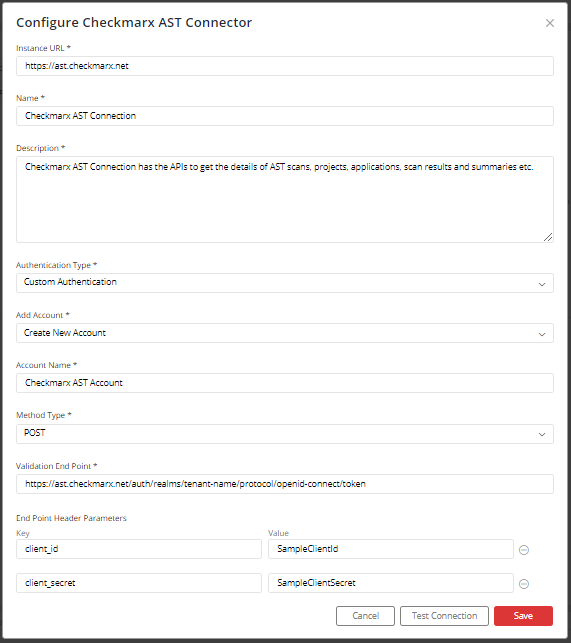
1. Enter your Checkmarx AST URL
for example:- https://ast.checkmarx.net (For US Environemt)
https://eu.ast.checkmarx.net (For EU Environment)
2. Select “Create New Account” and add a user-friendly name for account for e.g. “Checkmarx AST Account”.
3. Select "Method Type" as "POST".
4. Enter "Validation End Point" as:
https://<Your Server URL>/auth/realms/<Your Tenant Account Name>/protocol/openid-connect/token
5. In "End Point Header Parameters" Enter:
"Key": client_id
"Value": <Your Client Id>
Click on '+' button to add more fields for header parameter for the below parameters.
"Key": client_secret
"Value": <Your Client Secret>
"Key": grant_type
"Value": client_credentials
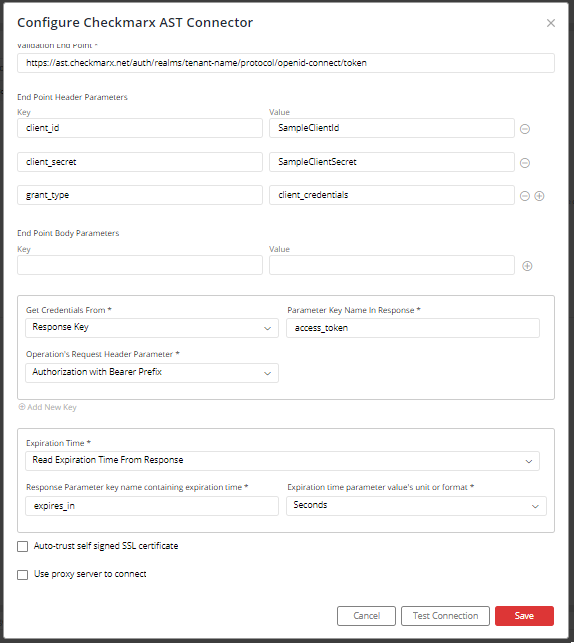
6. In "Select Credentials From" select "Response Key".
7. In "Parameter Key Name In Response" enter value as "access_token".
8. In "Operation's Request Header Parameter" select "Authorization with Bearer Prefix".
9. In "Expiration Time" select "Read Expiration Time From Response".
10. In "Response Parameter key name containing expiration time" enter value as "expires_in".
11. In "Expiration time parameter value's unit or format" select "Seconds".
12. Click on "Save".